
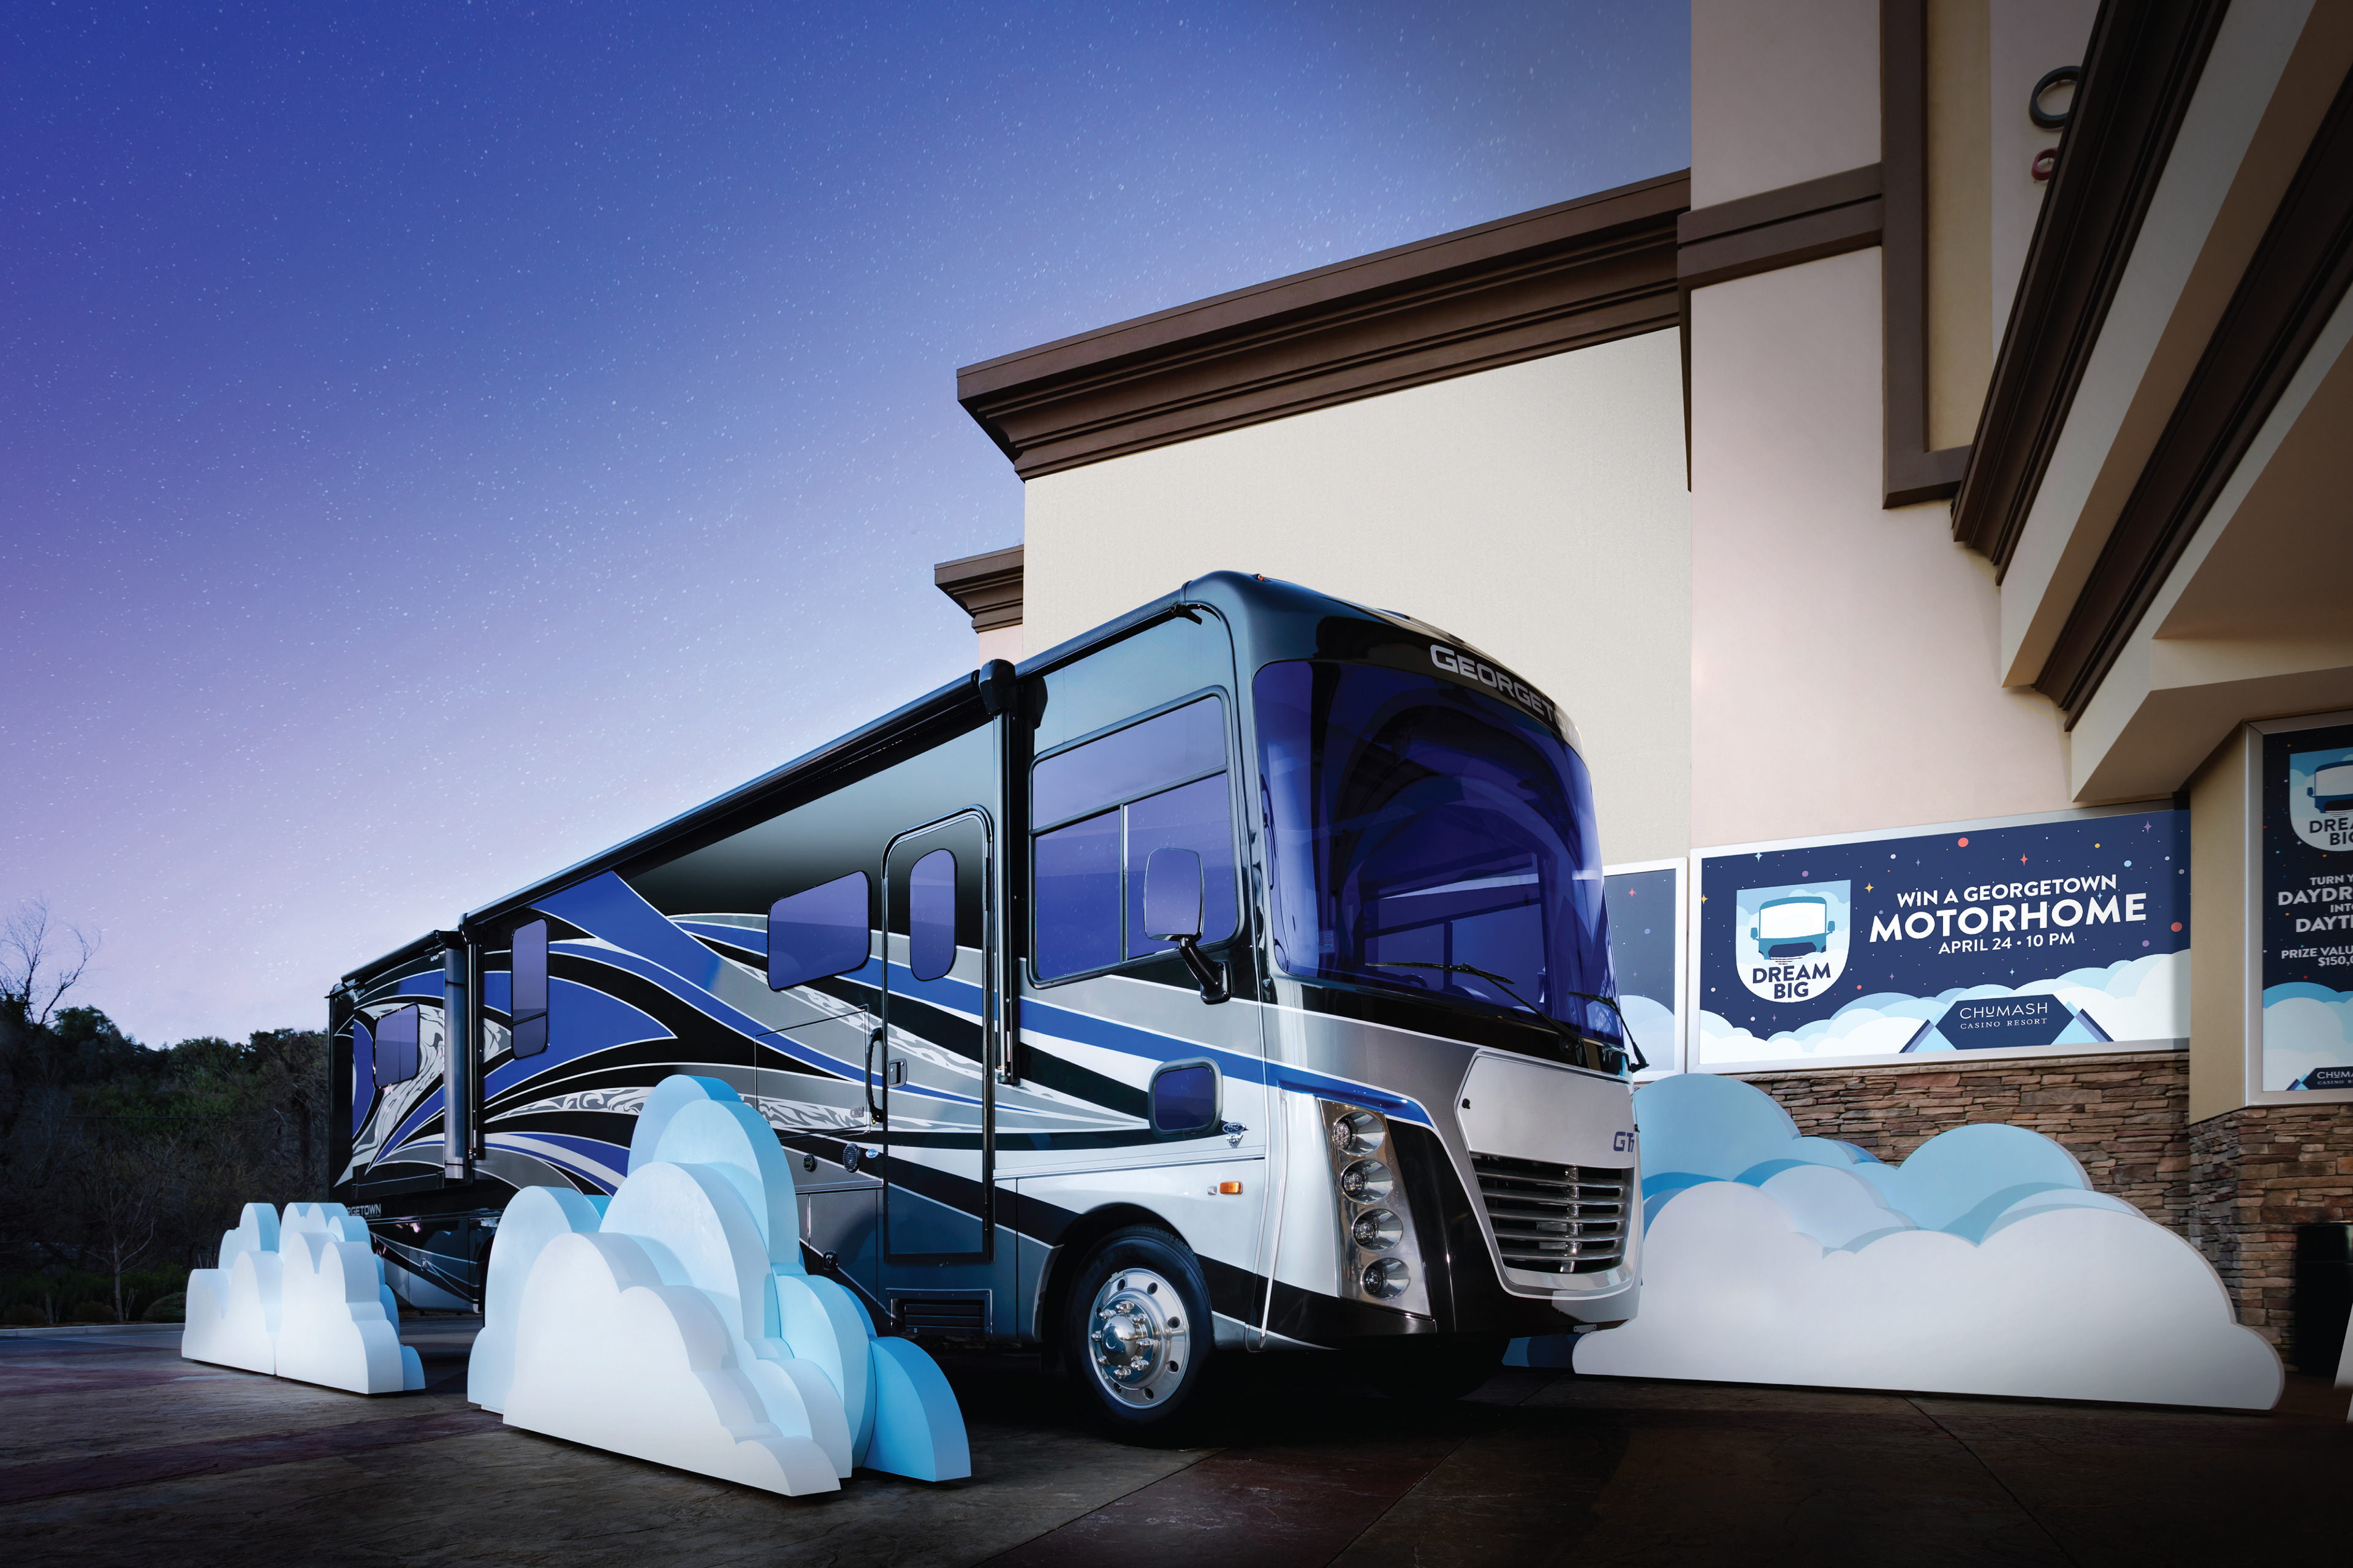
Jumping right to the good stuff, we see our rendition of driving in a dream. Replete with colossal clouds, designed and built by Nils Thyrring and me, showcasing the size and beauty of the motorhome and the possibilities afforded behind its wheel. We'll get back to this in a bit...
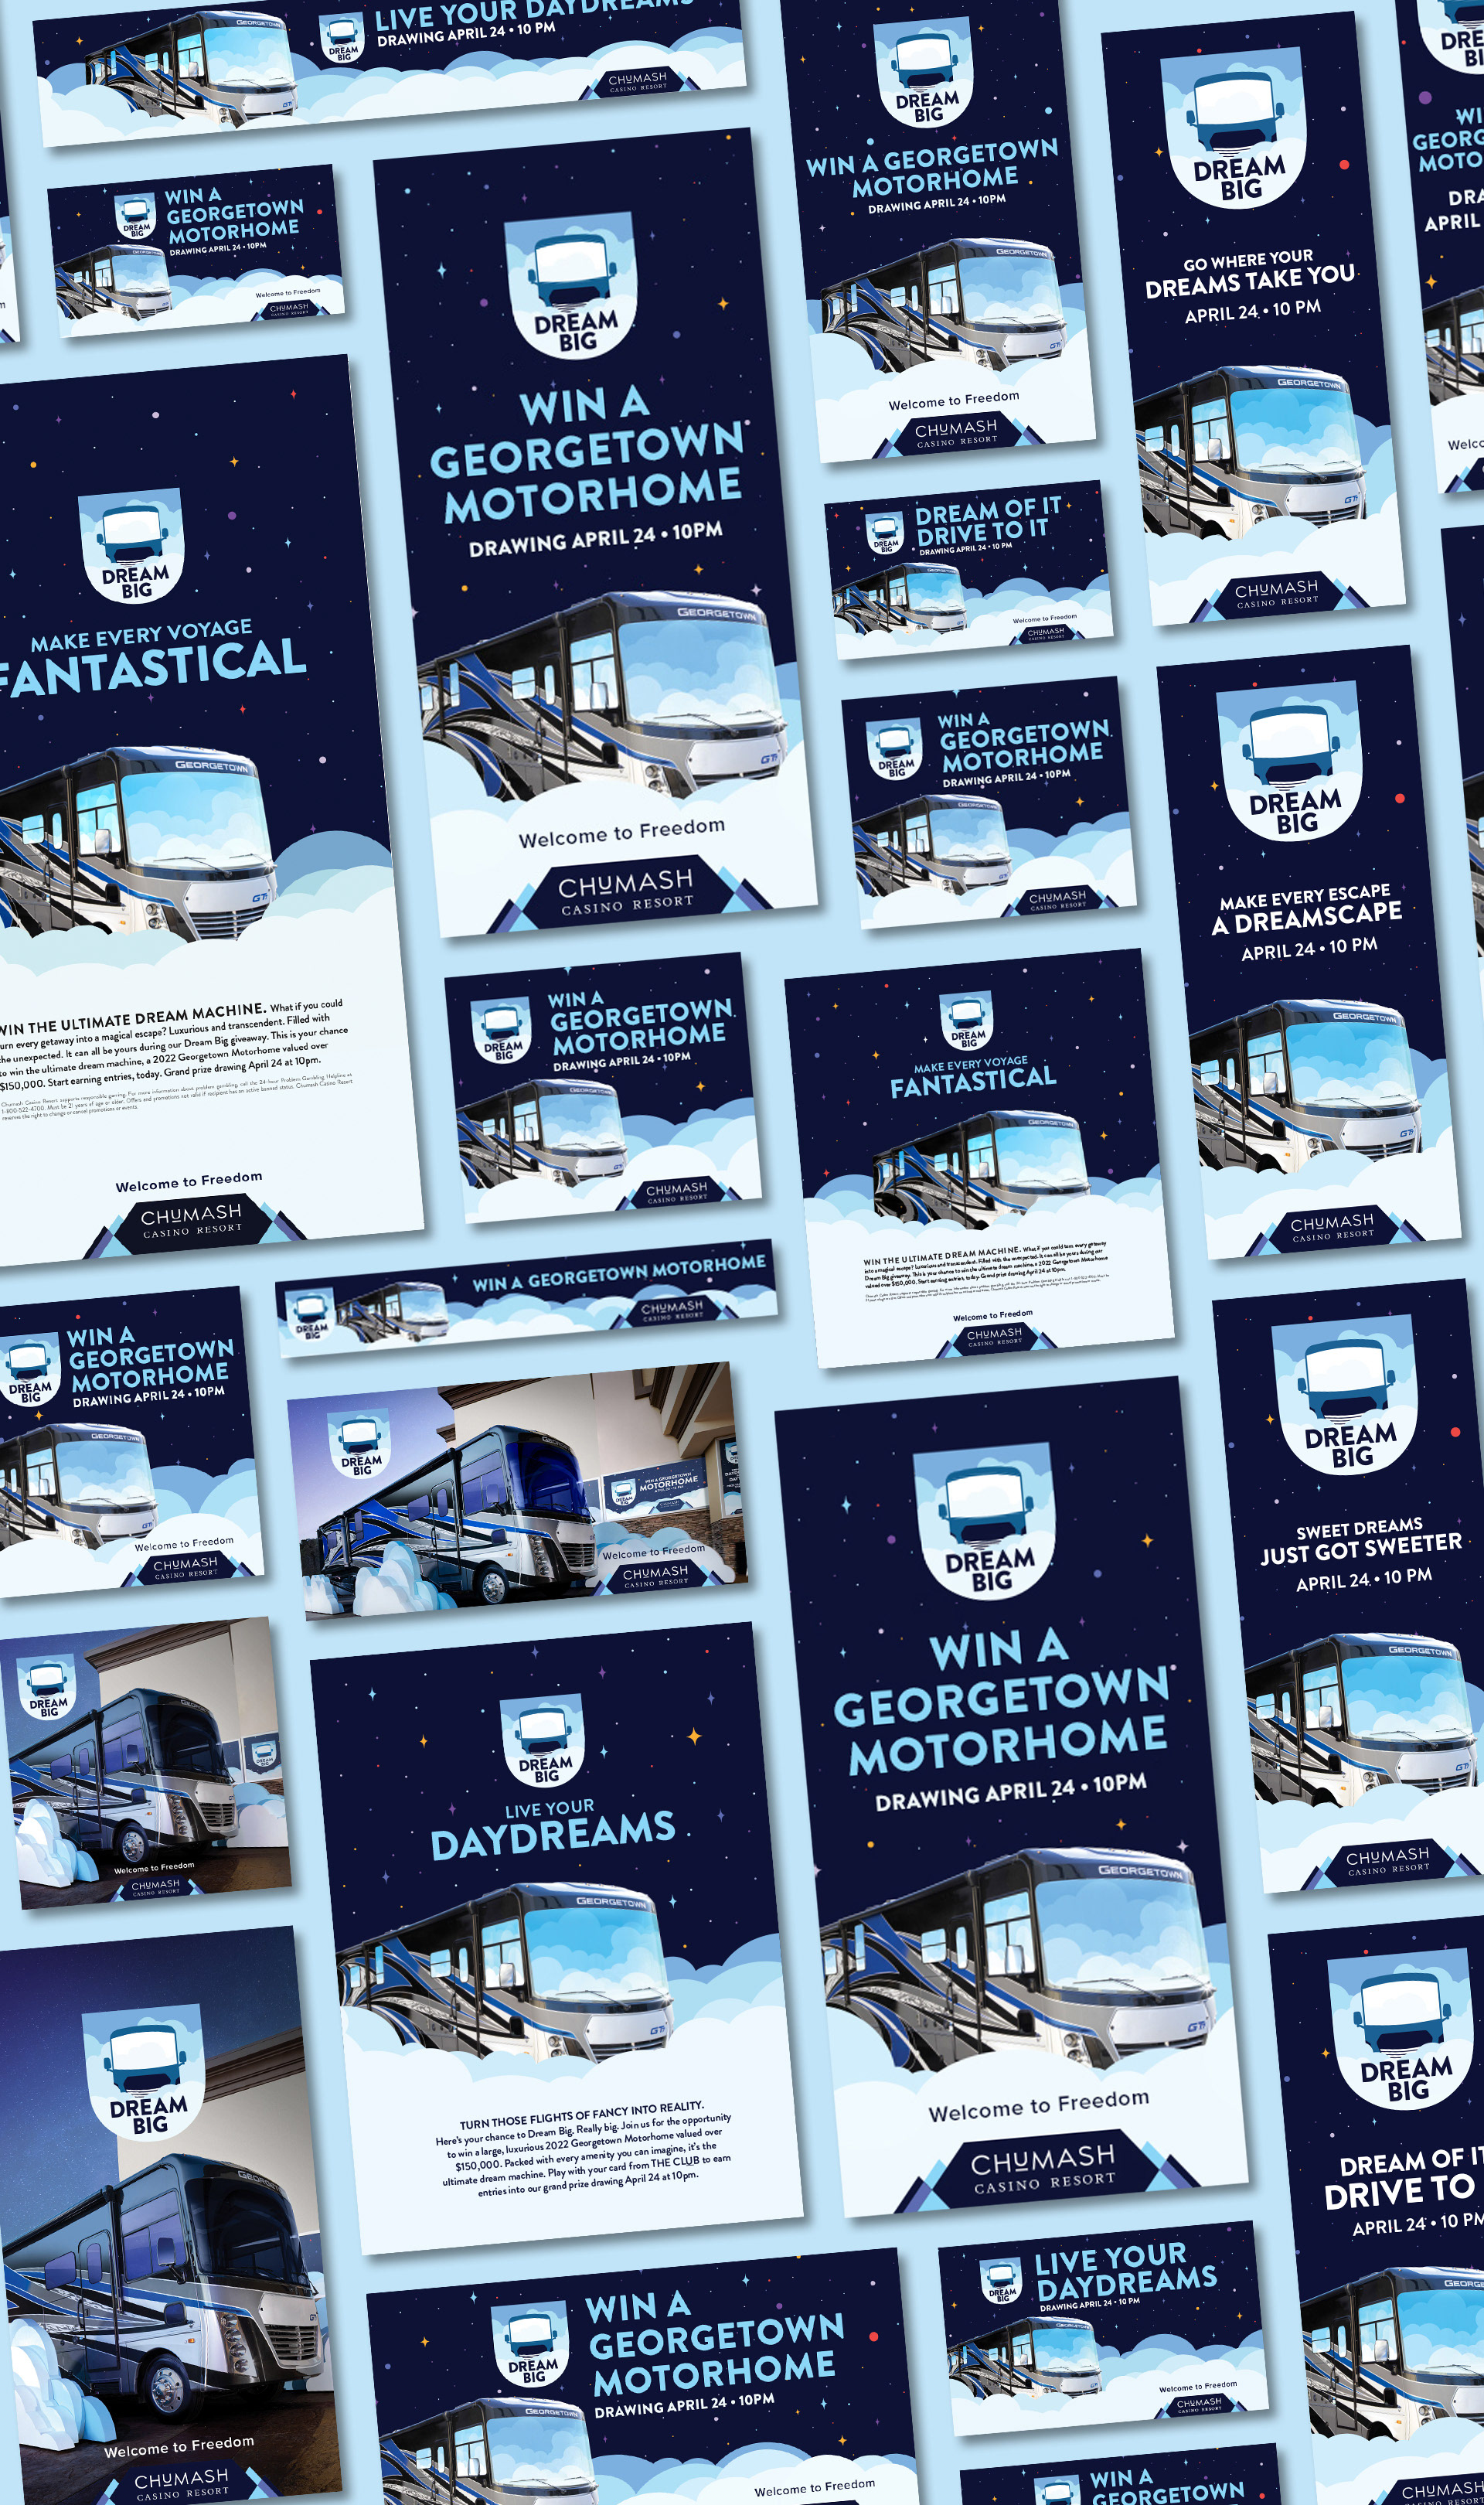
Before we began ideating on how to build out the installation portion of the promotion, I started developing the look and feel of the campaign. Below is the neat little color palette I created and a sample of some of the 100-plus print, web, social, environmental, out-of-home, etc., assets created for the campaign.
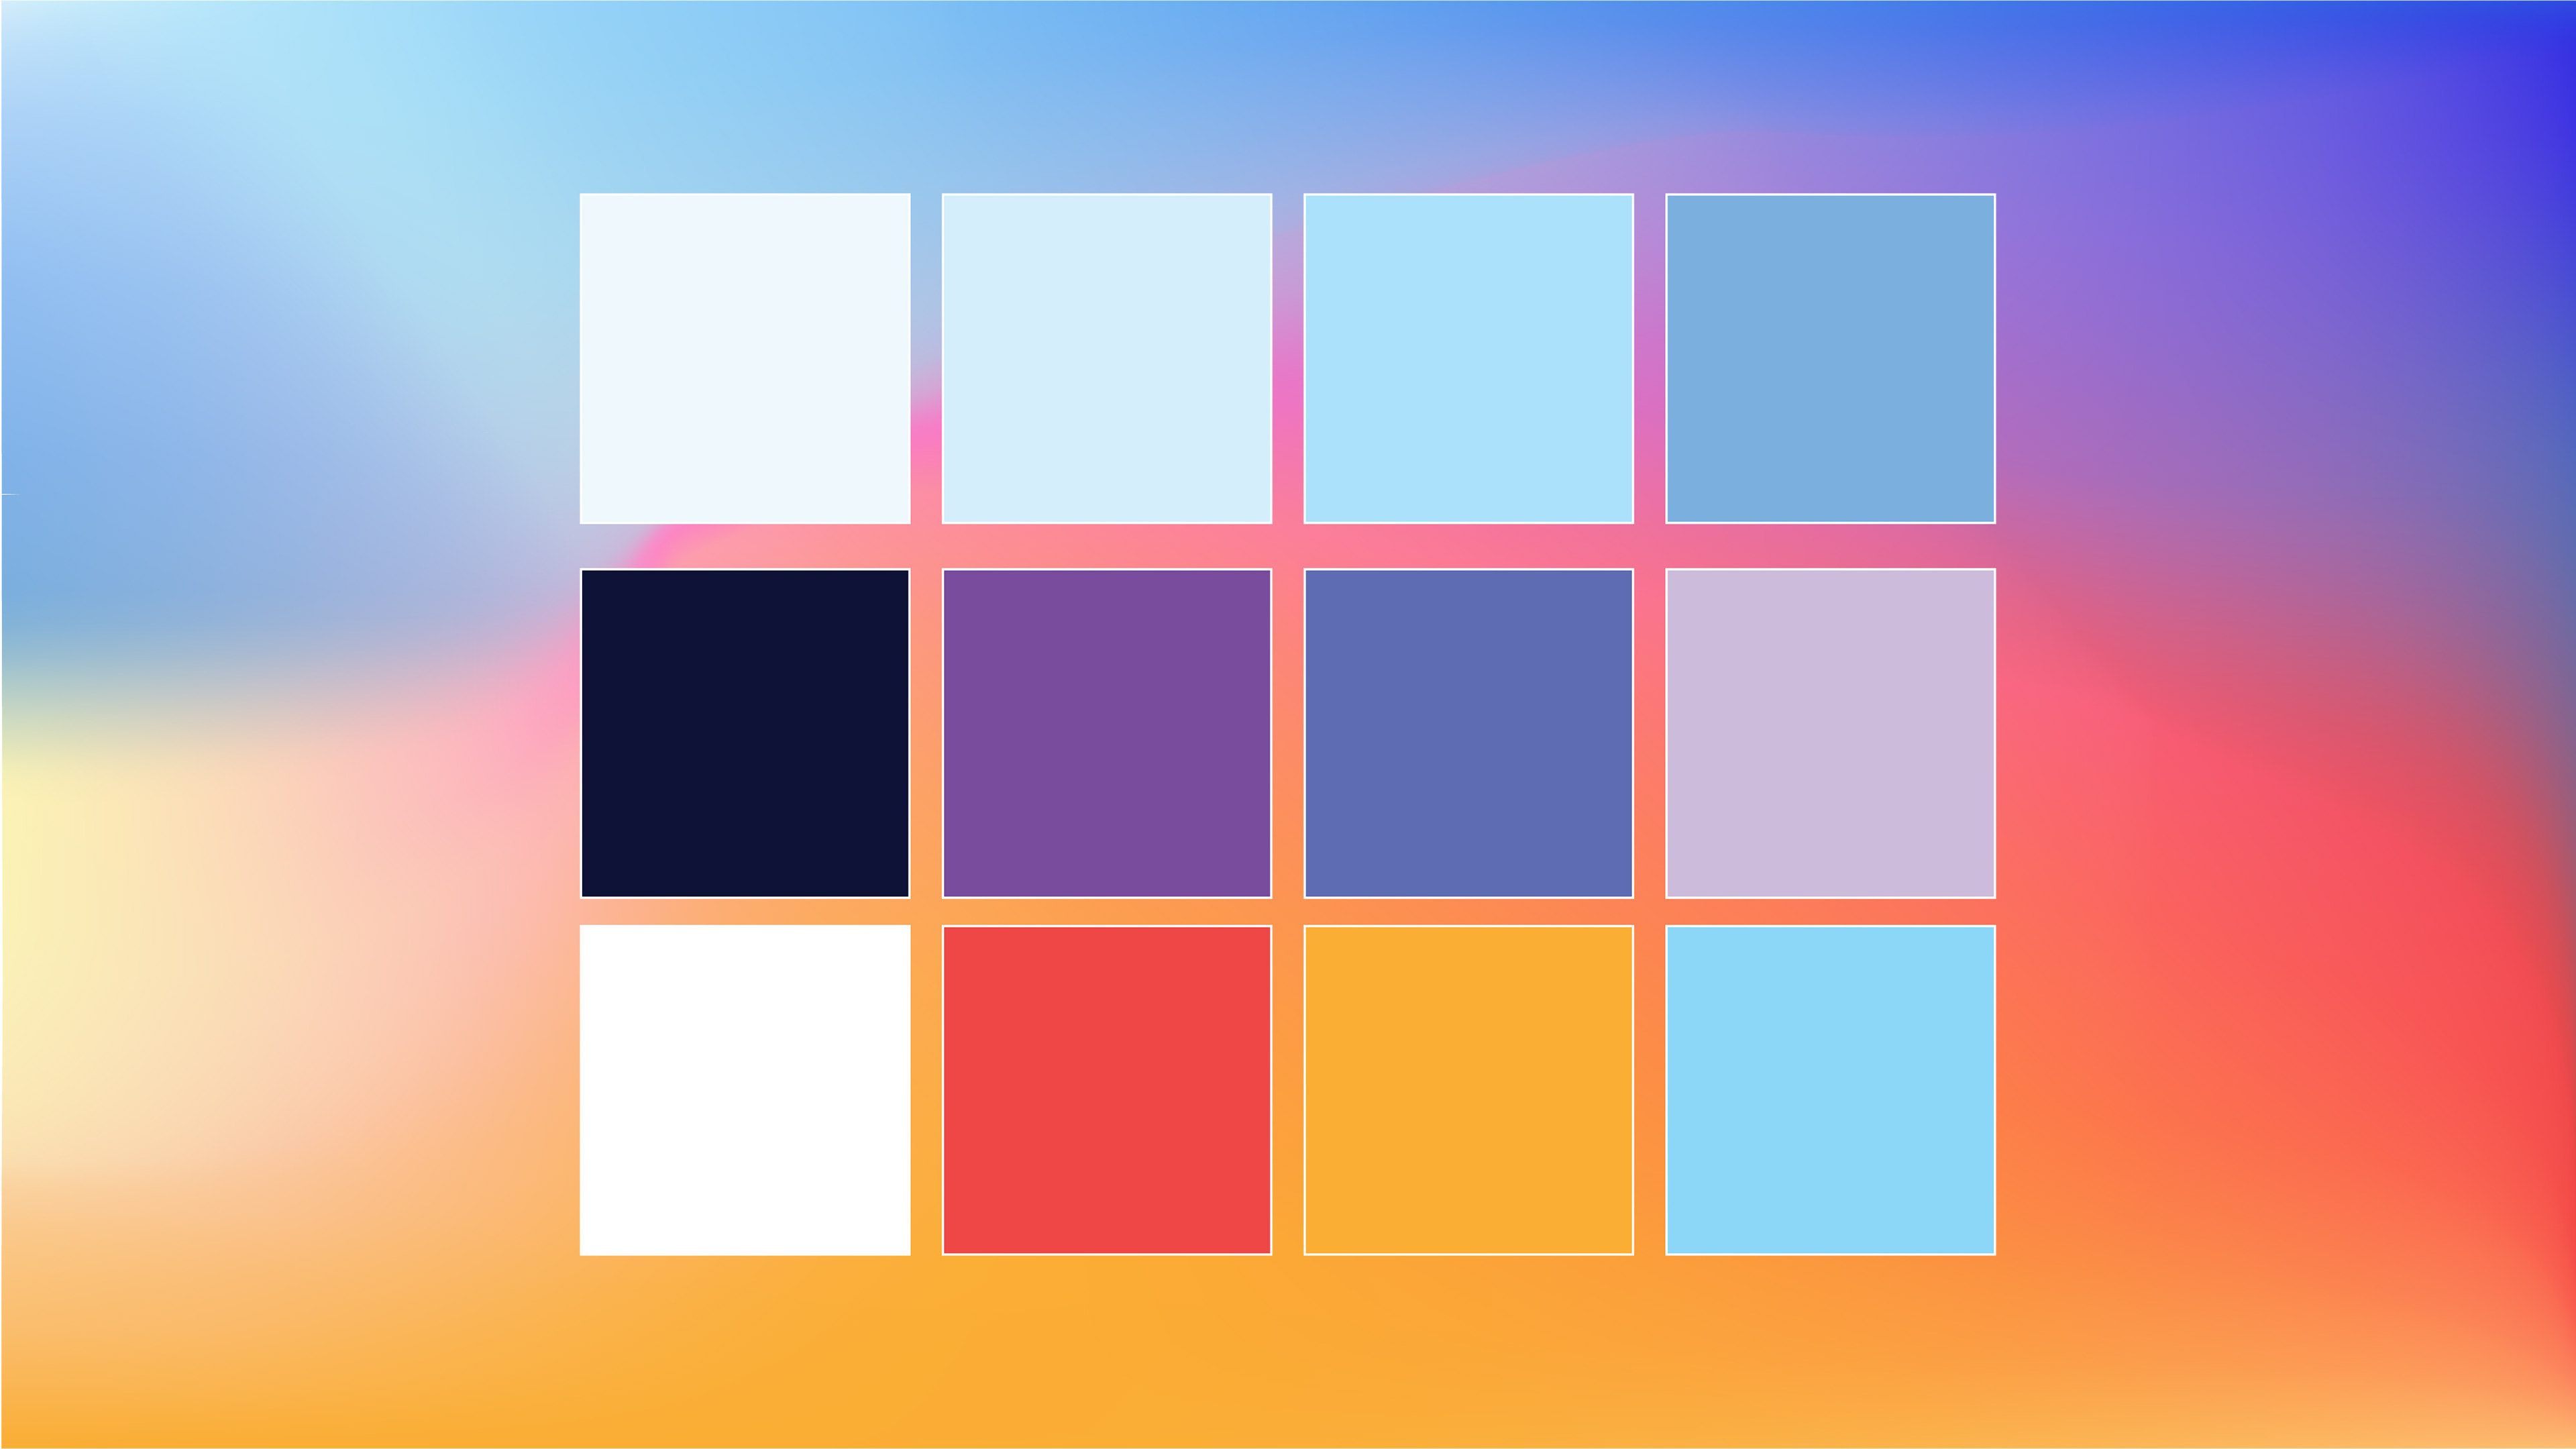
↑ said color palette ↑
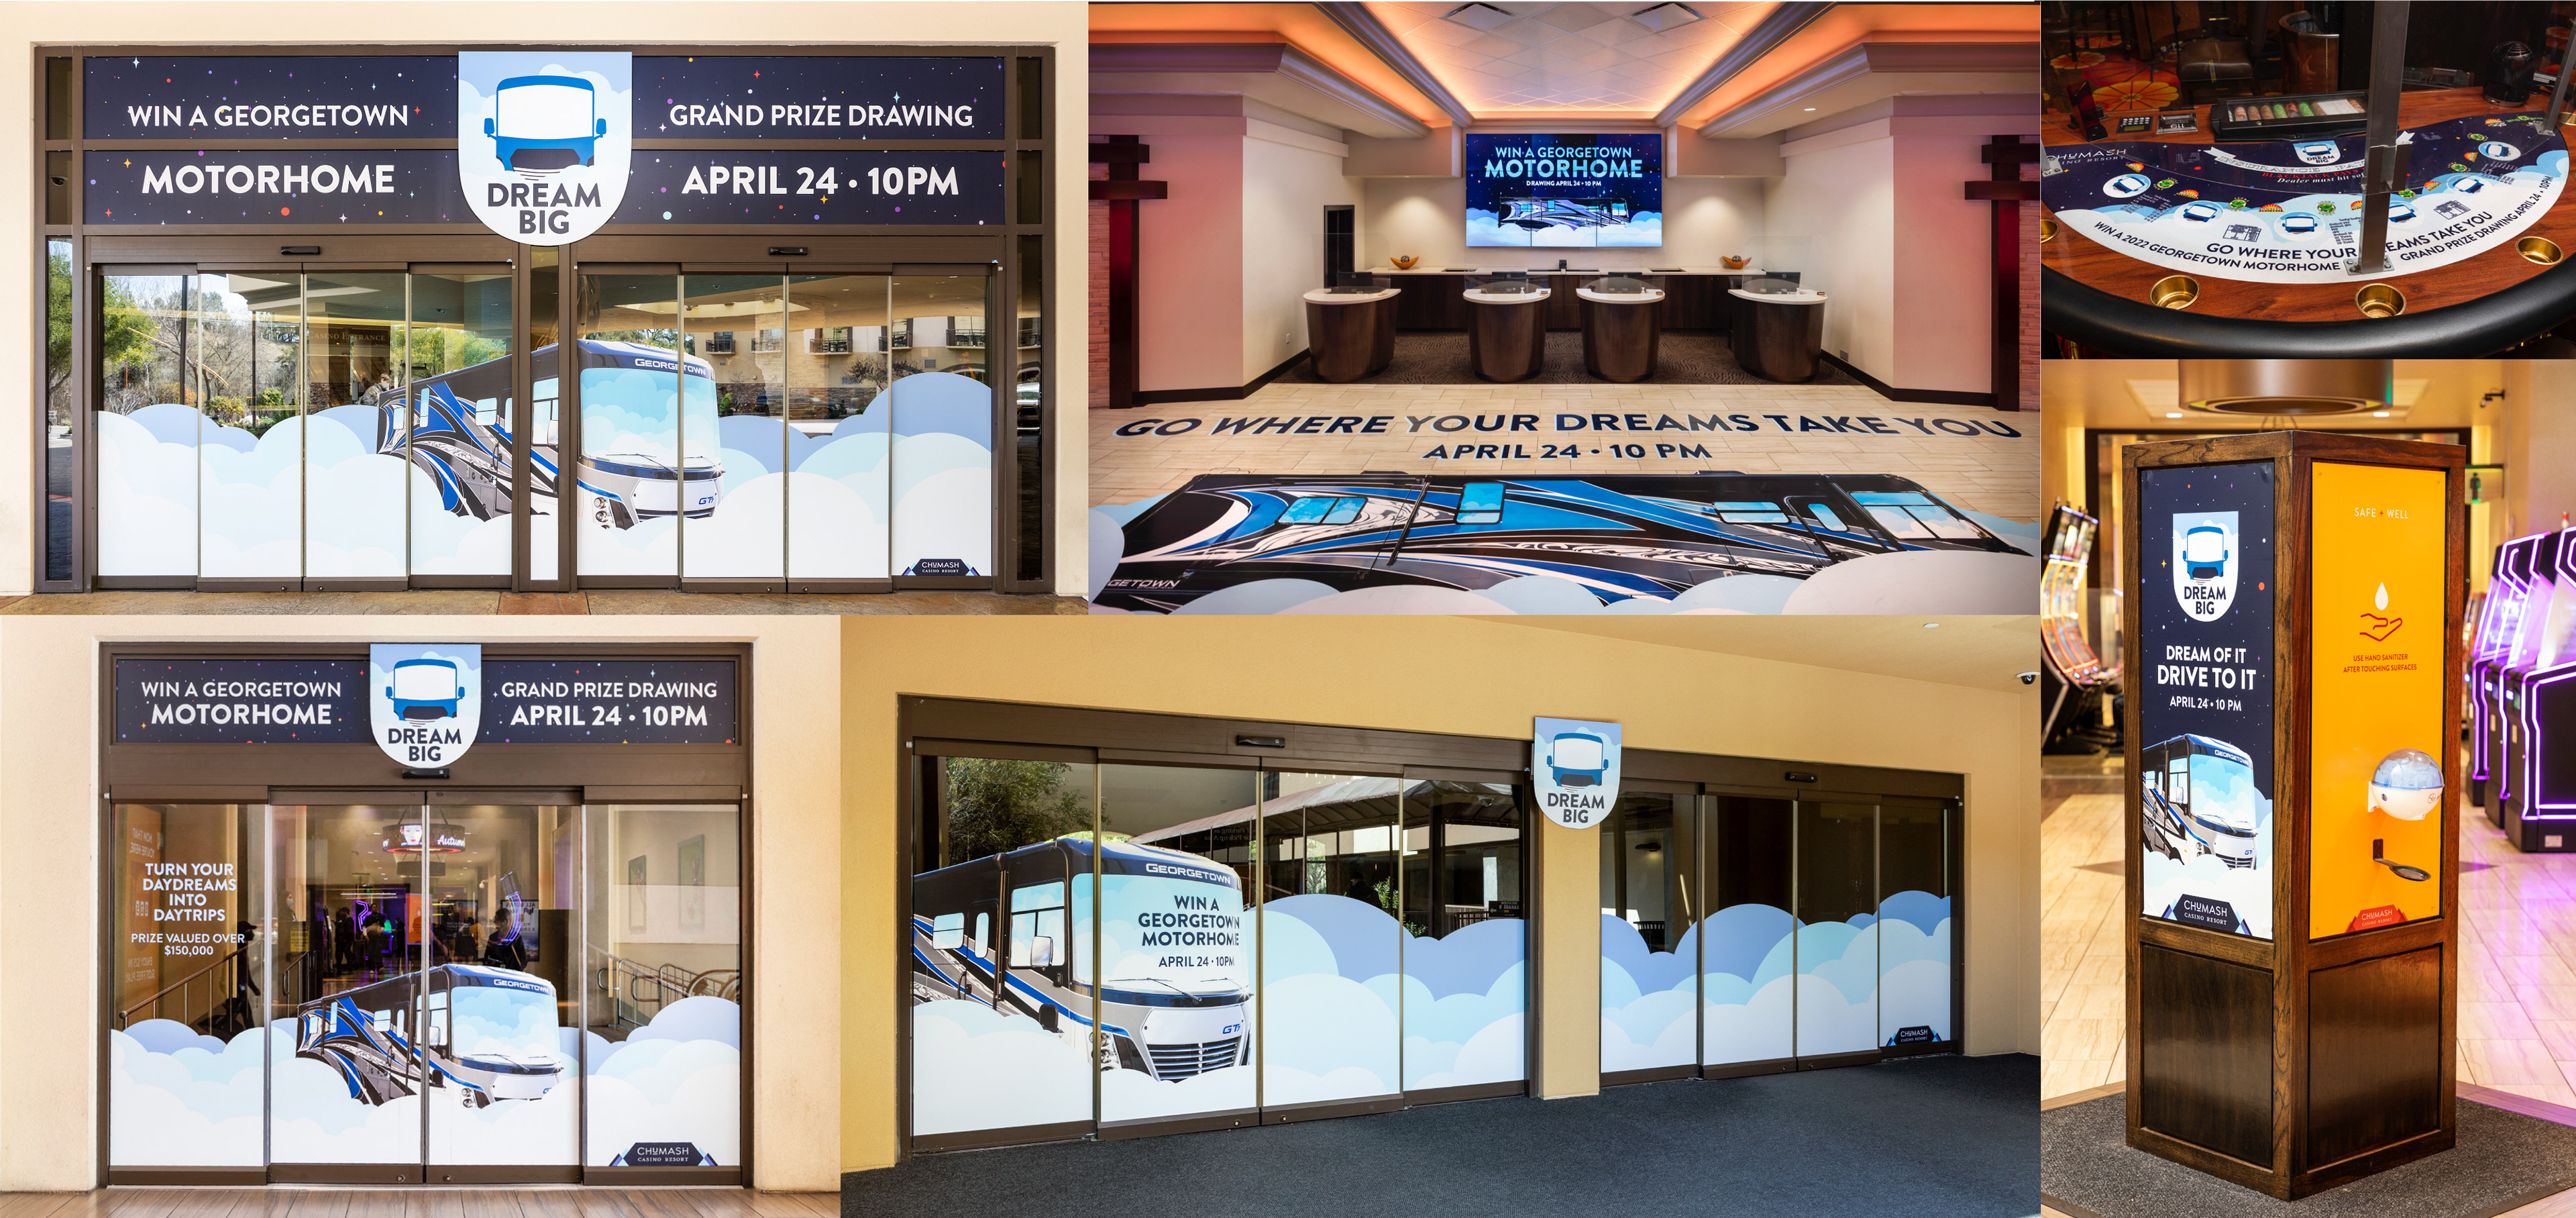
↓ aforementioned assets ↓
↓ aforementioned assets ↓
Alright, back to the main attraction here: the environmental display portion. As seen below, I mocked up the original concept with 3D dome-like clouds, which Nils and I went back and forth on several production methodologies to come to the conclusion it would be way over budget and not a sturdy enough build option to be interacted with and exposed to the elements for months at a time. After deliberation and a few iconographic influences (thank you, Apple Weather app icon), we landed upon a 'flat' cloud production that would better tie into my key art, provide a sturdy product, and land in our budget. This new 'flat' concept can be seen in the bottom row of this image block, along with a top-down view of our installation drawn to scale.
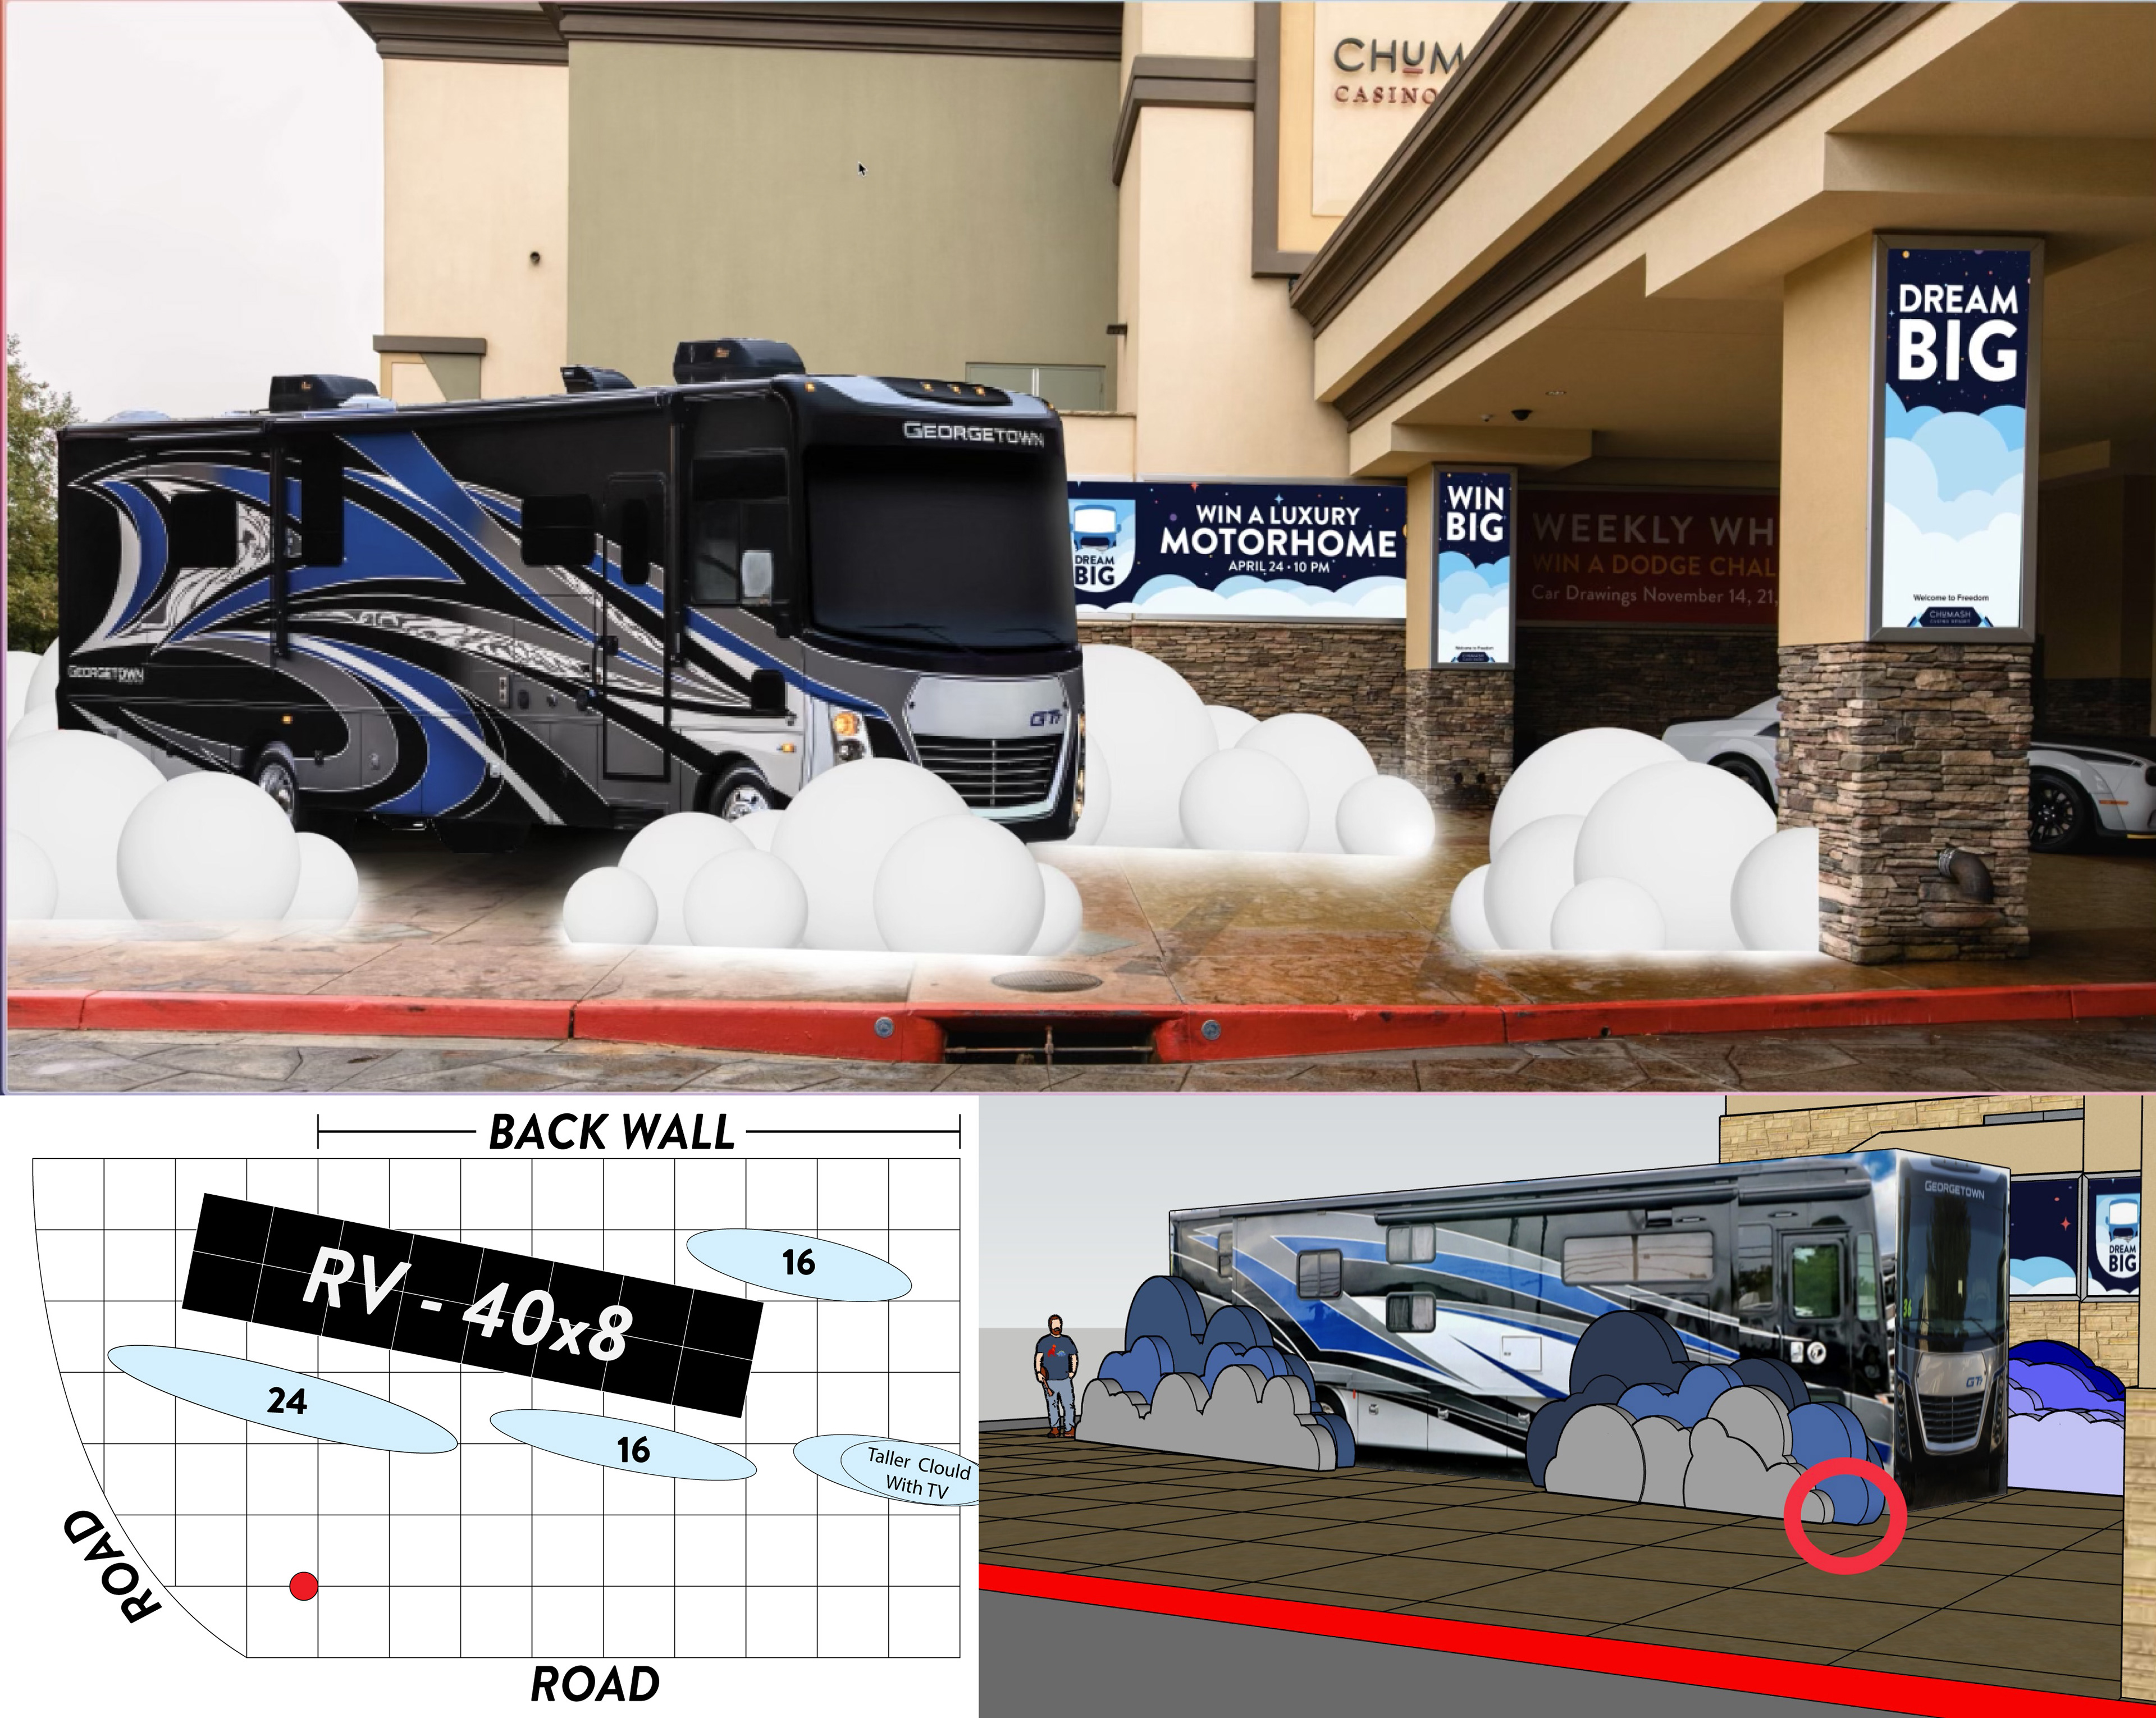
↓ various used and unused build-out ideas, concepts, and methodologies ↓
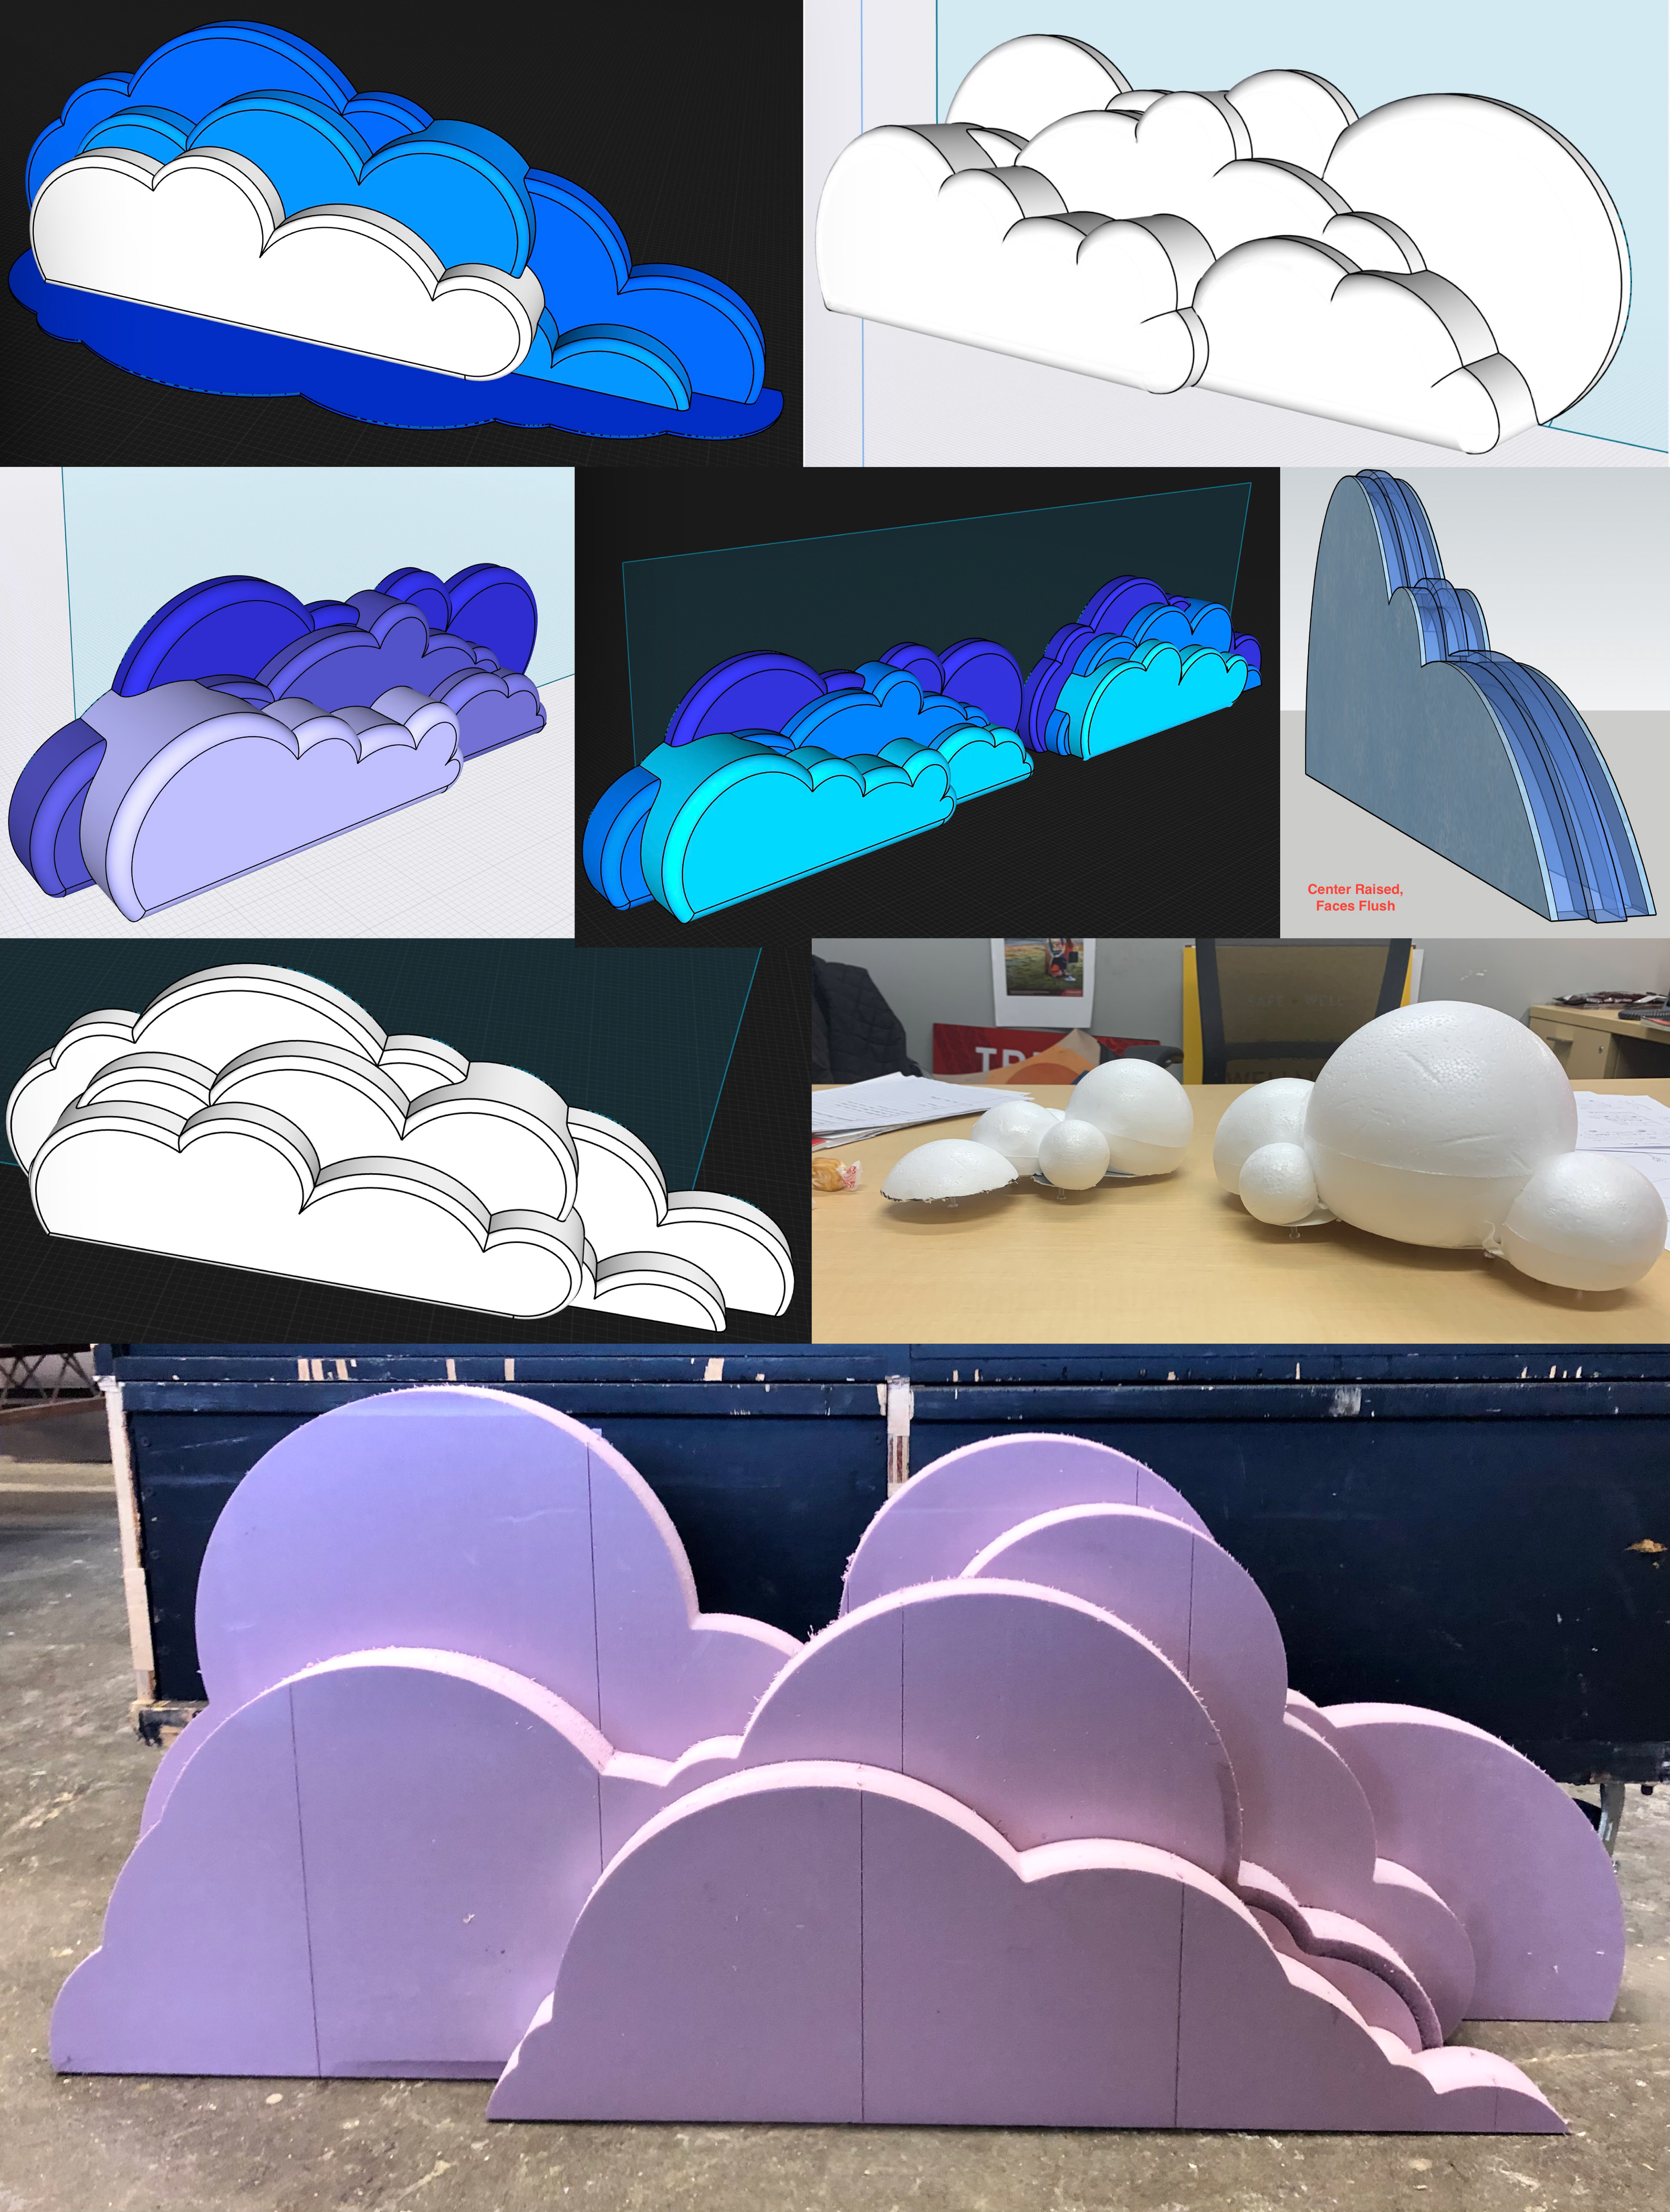
Once locked into the 'flat' build-out, we grappled with finding the right materials. As seen above, we experimented with aluminum sandwiching epoxy sheets to allow light to spill out from the clouds, Pink Panther foam sitting on lag bolts offering a lit undercarriage, and finally, our winner, MDF on wooden slats offering a chance to run LEDs along the underbelly.
With a clear direction of what we would construct the clouds from, I set out to create scale models to hand over to Nils for fabrication. As seen below, I made a system of eccentric circles of known radii and center points that we could build out in 3D space and begin shaping each layer of our cloud structures.
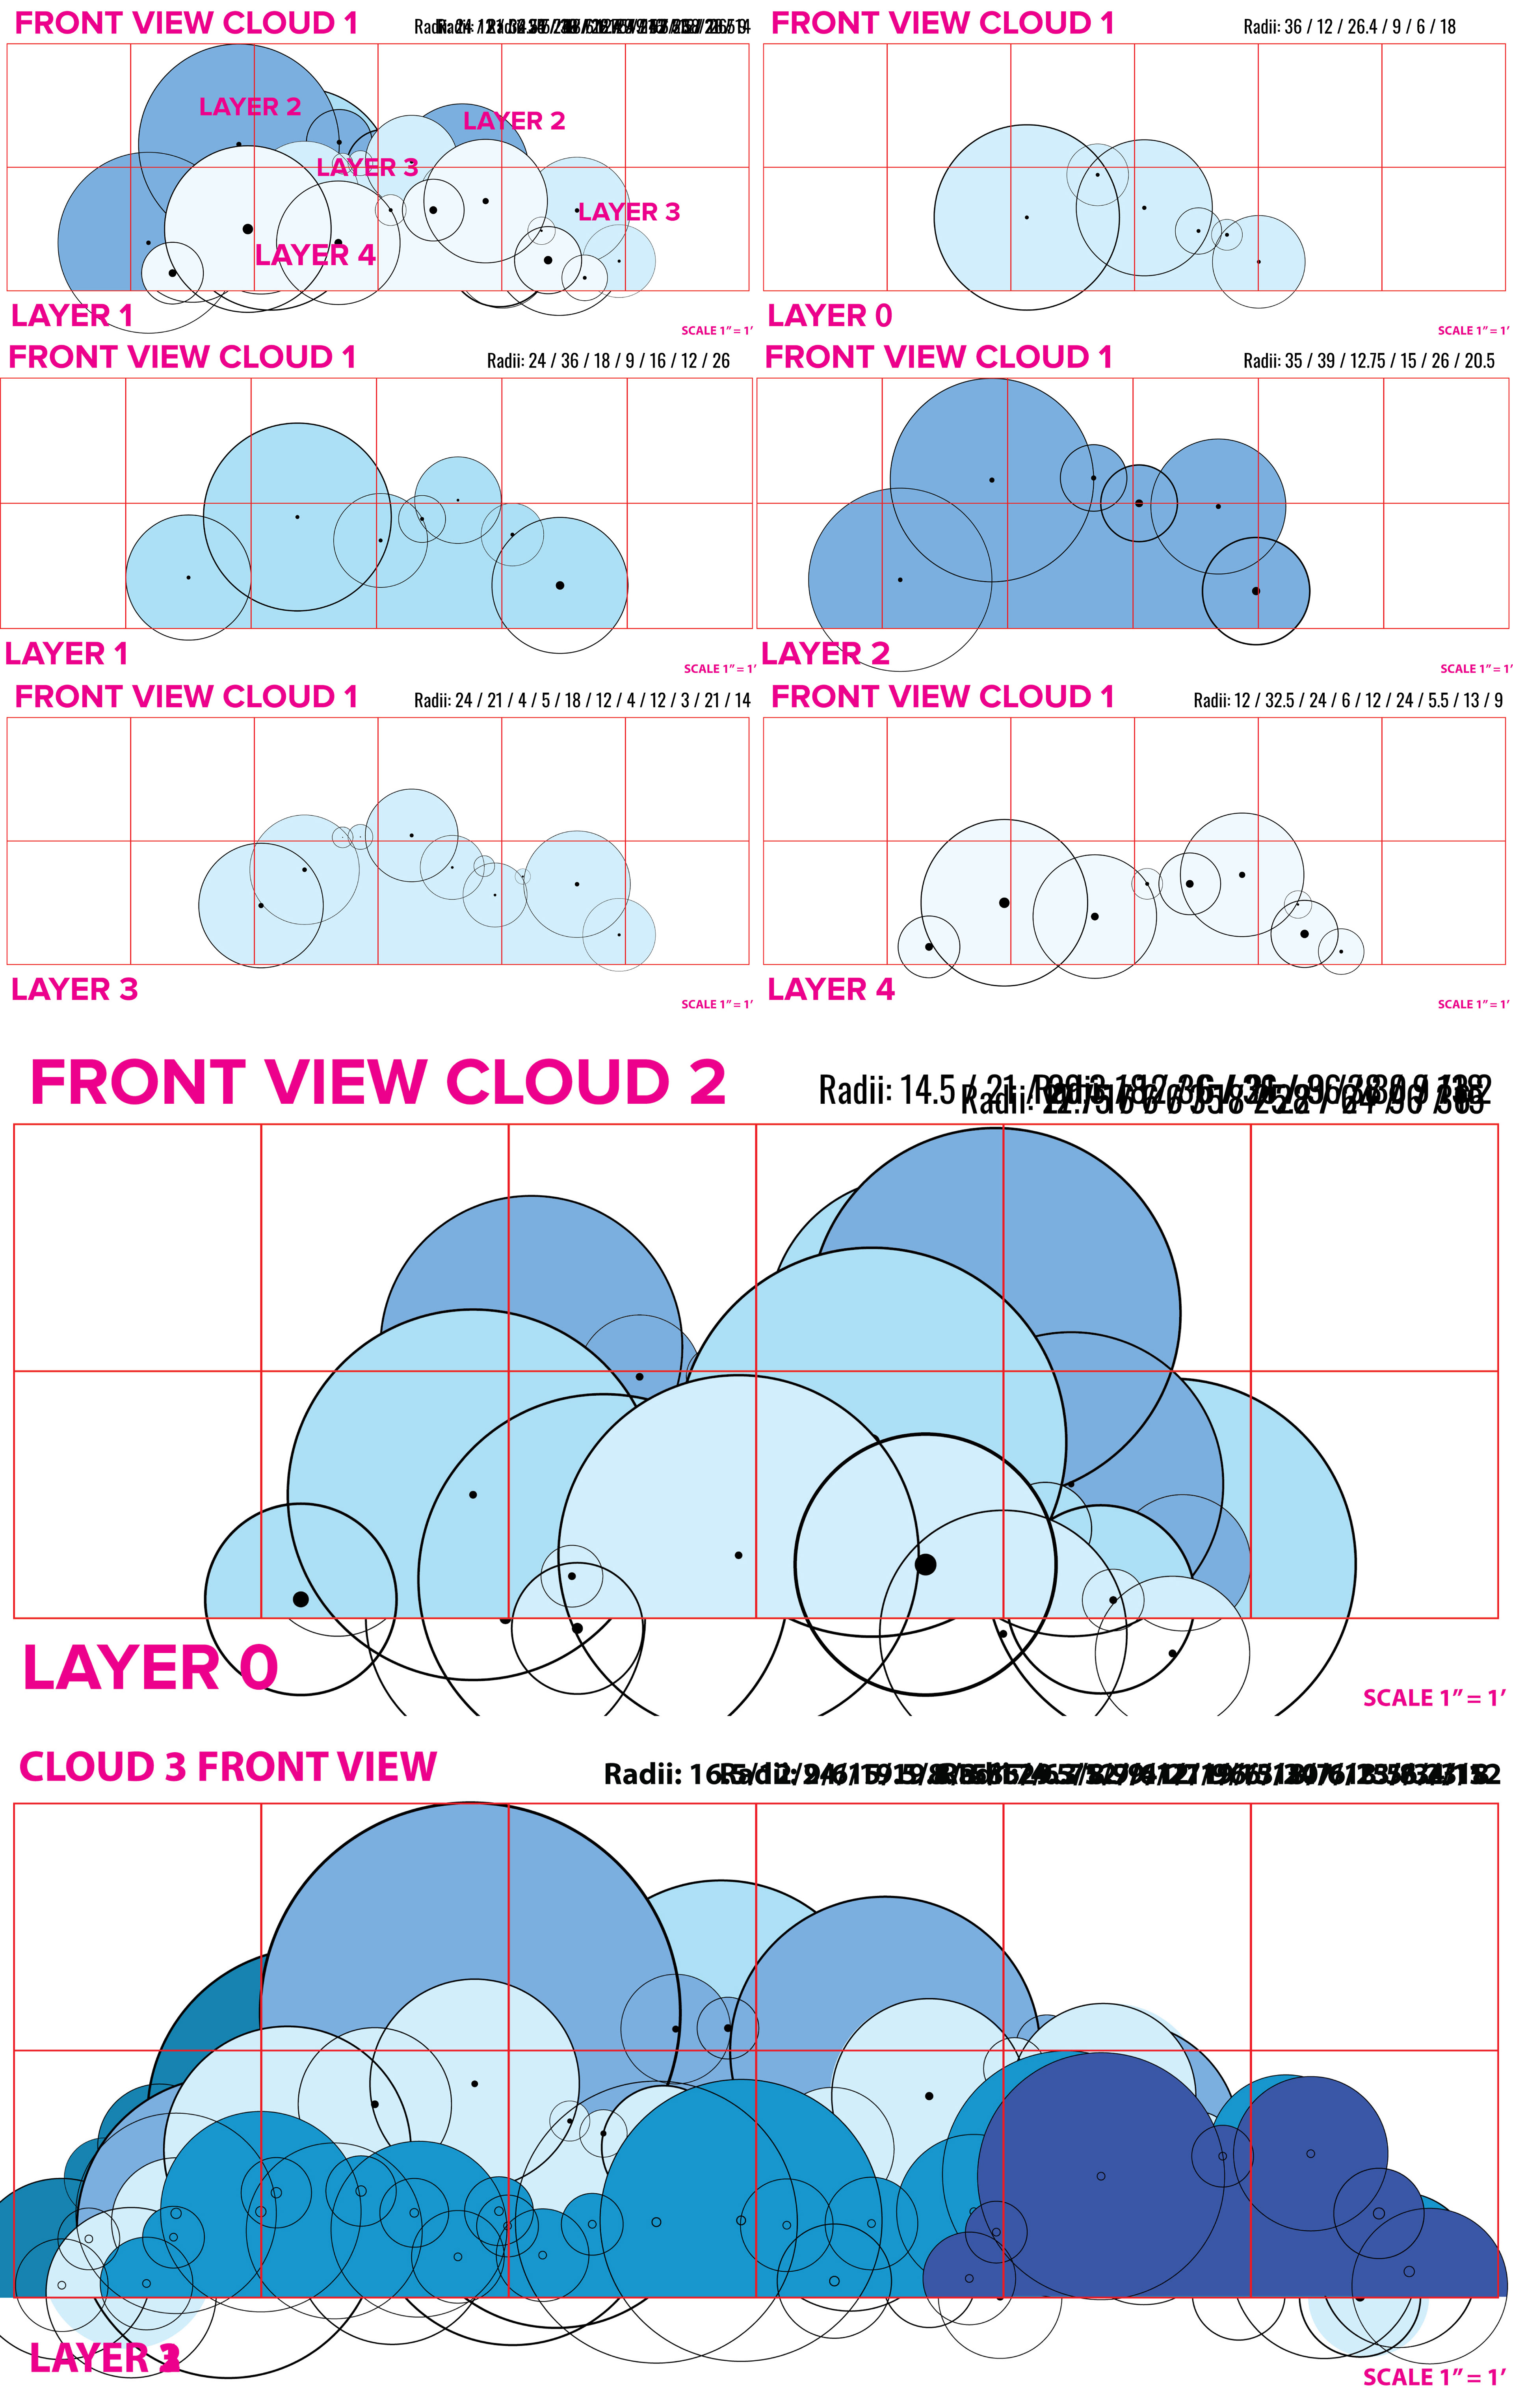
With all the clouds broken into known circles and layers, we began to dissect each internal layer into 'ribs' to decrease weight, add internal structure, and reduce the amount of raw material needed. Additionally, a hidden cavity was recessed into the bottom of each cloud to house LED light strips giving each cloud an appearance of glowing/floating. An assortment of internal structures, ribbing, and cuts is shown in the images below, along with a few of the finished/installed clouds.

Lastly, to spread the promotion throughout the property, I created double-sided vinyl graphics to be installed at all entry points, along with a few floor graphics, signage, and table felts in high-trafficked areas.